The What and Why of Keyboard Restoration, for me
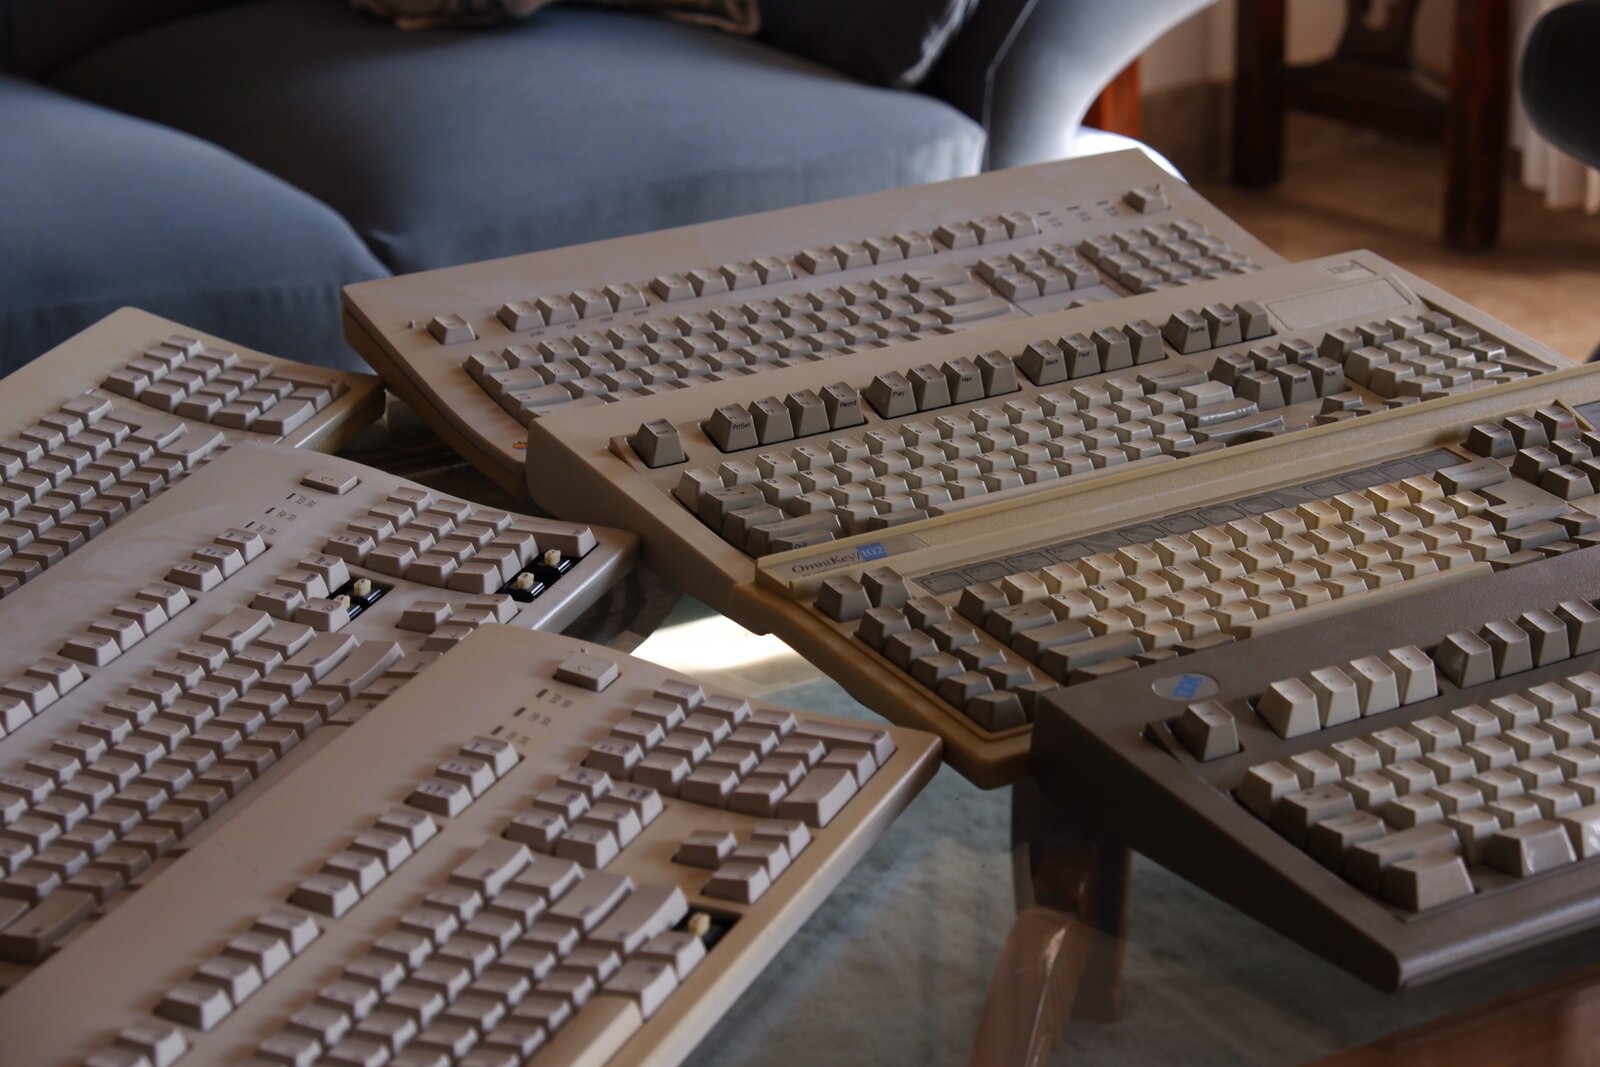
I own over twenty keyboards. Keyboards are but a tool, and you likely touch one every day of your life, in one form or another. A virtual keyboard on a phone counts, technically, and so does the one on your laptop, even if neither of them are “dedicated” keyboards. While one keyboard on your desk will do the job you ask it to and you won’t need to give it a second thought until it breaks, I still find keyboards interesting enough on their own, and even spend a significant amount of money on them. The Times of India even put my name in newsprint for owning so many keyboards a few months ago. Doing the numbers on their cost is rather boring though, plus it requires me to take inventory which is a lot of work, so I’ll skip over all of that. I’m mostly interested in spelling out why I own so many of them, and why a lot of them are from before I was even born.
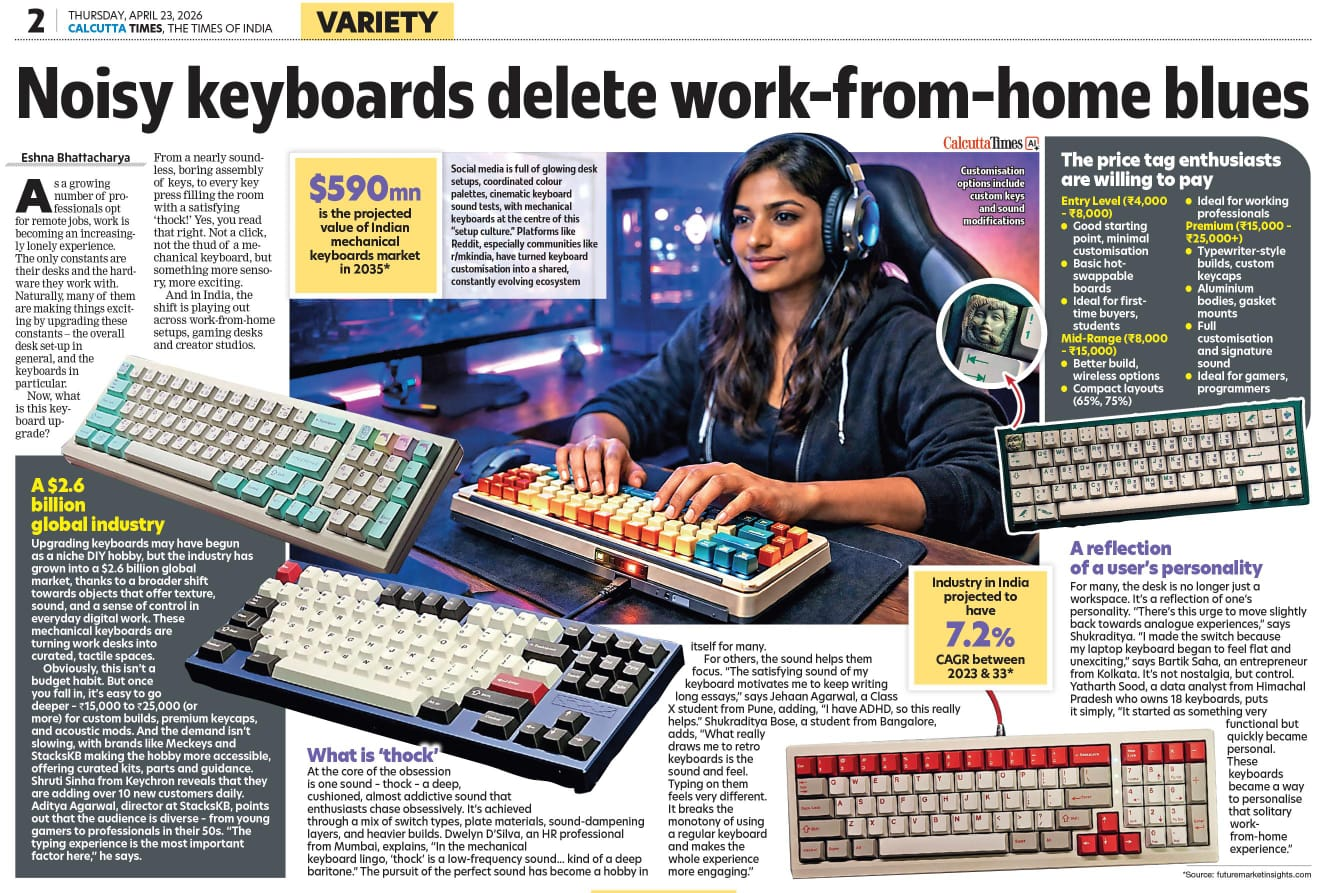 We will ignore the unfortunate AI slop. Look at all my keyboards that are featured (everything except the top right one) here! And also the fact that I am mentioned by name (bottom right). TOI
I think it would be most constructive to start with what even is a keyboard. A laptop keyboard or a cheap modern slim thing is a electronically-conducting membrane, on top of which is a sheet of rubber “domes”. The keys you press are pressing down on these domes, and electric signals are conducted through the membrane when contact between it and the rubber dome is made, and your computer interprets it as the respective keys being pressed. The domes also provide a resistive, “spring-like” force and impart tactility to the key press, alongside making contact with the membrane. However, most of my keyboards are mechanical, where the rubber dome sheet is replaced with individual switches that are removable and replaceable individually (and thus, modular and fixable too), and the membrane is replaced with a printed circuit board, which is fulfilling the same purpose with the switches soldered on to it. There are exceptions to this rule in keyboard design too, so you can have individual key switches with a membrane actuating sheet, as well as rubber domes that trigger signals on a PCB, but they’re both less common, and so are some other alternative mechanisms that are different still. Thus, the definition of a “mechanical keyboard” is rather nebulous and harder to pin down, and the presence of either domes or a membrane do not disqualify a keyboard from being notable, though the presence of both simultaneously generally makes for a “boring” keyboard.
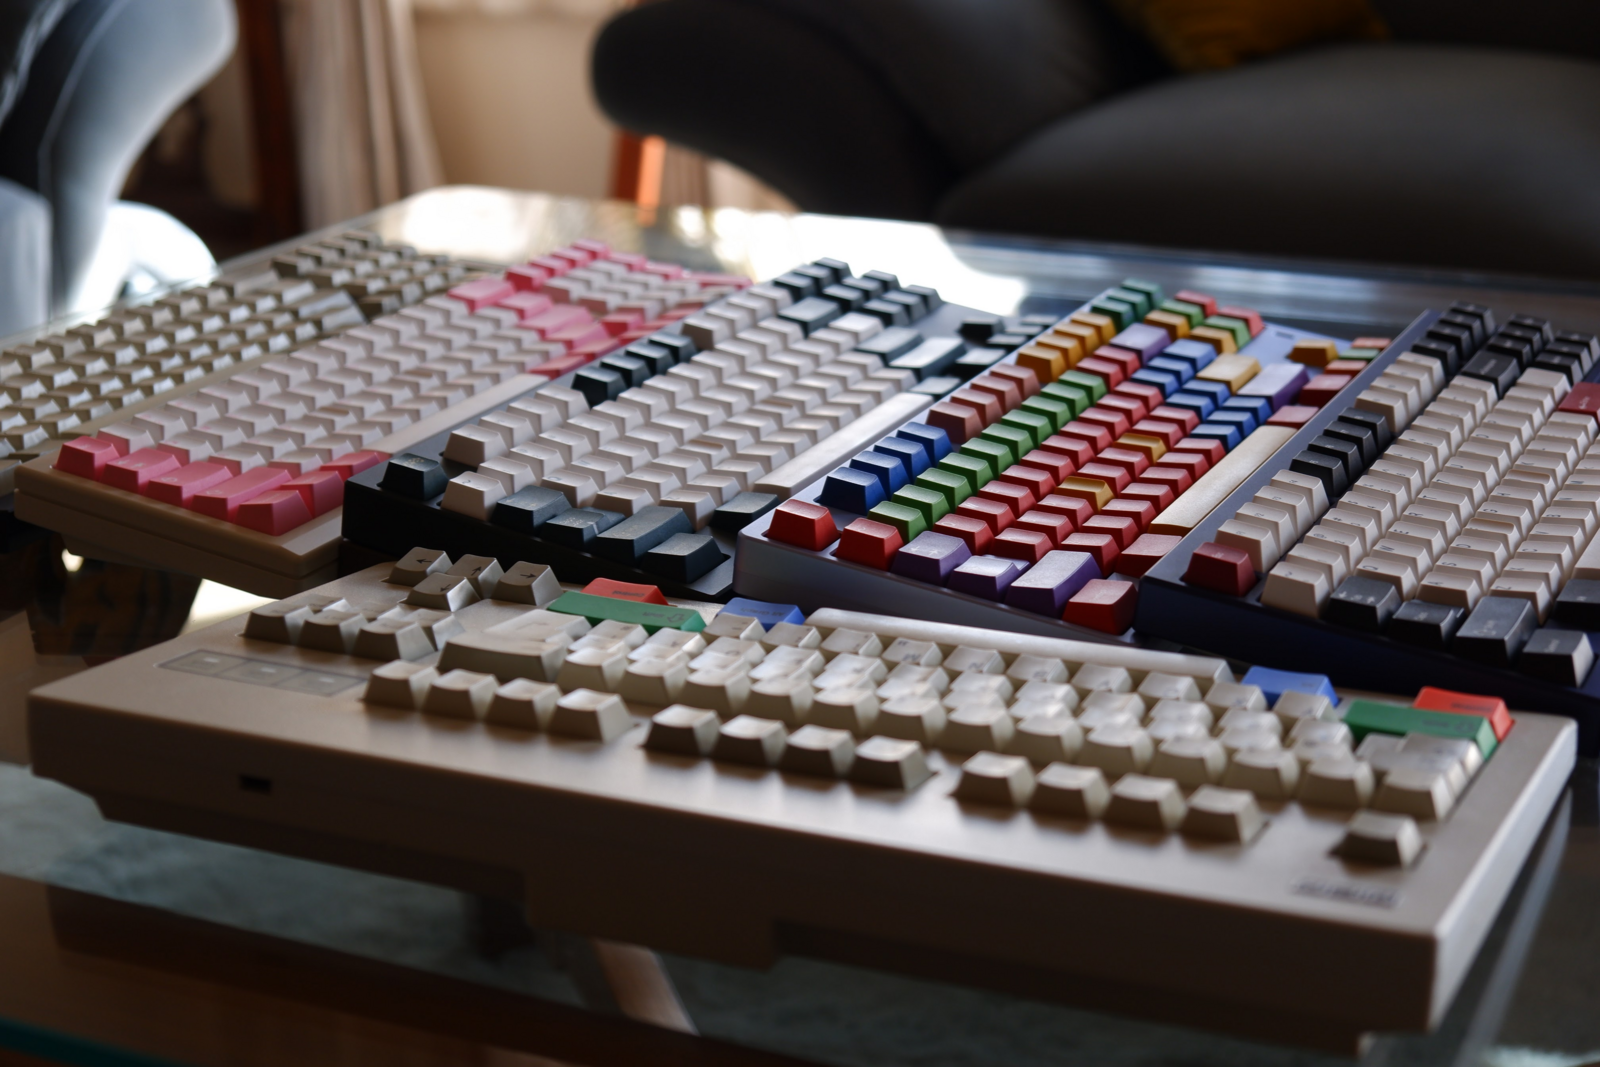 The modern stuff. Lots of aluminium, and some brass for spice.
Moving on to materials: modern keyboards follow a pretty standard model for contemporary enthusiast keyboards. They are usually made of aluminium and brass, which gives them a lot of heft, and the brass specifically increases the density inside the case, making the keyboard heavier and attenuating the sound made by the key presses a little bit. They all use PCBs and individual switches, all of them being based on the Cherry MX line of switches. Cherry’s patent on the MX switches expired in the mid-2010s, meaning that rival manufacturers sprung up and made similar switches and keycaps compatible with them pretty much instantly and changed the enthusiast market. You can just buy new switches and keycaps now, using entirely different materials and some even innovating on the very mechanism inside these switches. There’s a lot of innovation there from all manufacturers of switches, and even vendors solely dedicated to selling them to end-users.
Within my vintage boards though, there is still a lot of variety, but in a different way. I do have one vintage Cherry keyboard, as well as a couple of other boards that aren’t made by Cherry but use their switches, but primarily, these keyboards used entirely different switches, made by manufacturers other than Cherry. They can have switches made by Alps Electric, who stopped their production in the late 90’s/early 00’s, or use IBM’s Buckling Spring switching mechanism, and so on. All this to say, my vintage keyboards are a lot more varied, and there’s an added challenge of “making them work” or restoring them with the limited amount of equipment you only have on-hand, as buying new supply is impossible, and all you have are other boards you can transplant stuff from. I go into some detail on how I did that, or will, for some of my vintage keyboards, and also briefly look at a vintage-inspired modern build I have in store, while also explaining some of my justifications for why I do all this, and what sort of enjoyment there is to be had for me when I do this.
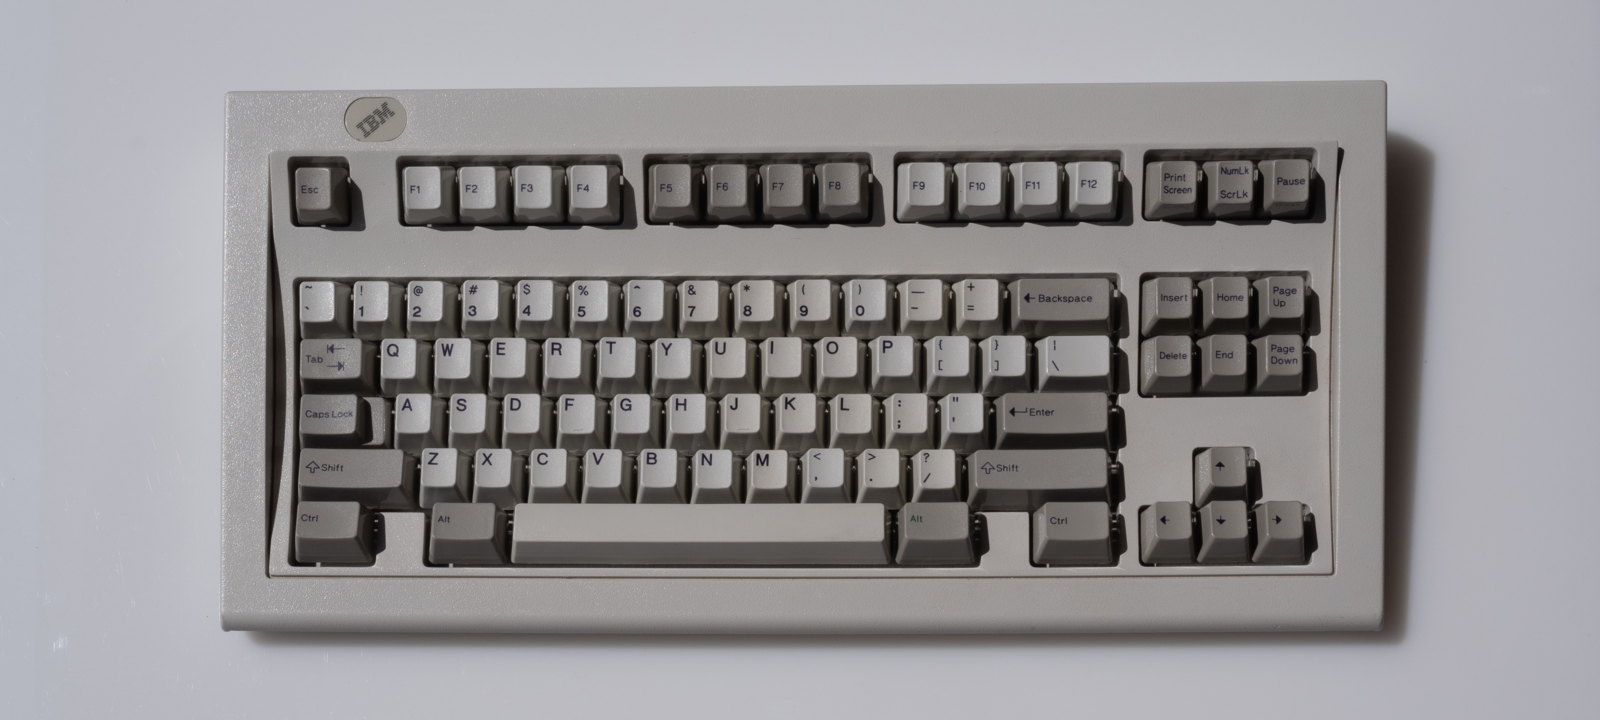 My SSK. This was small back in the day.
I am typing this on my IBM Model M Space-Saving Keyboard (SSK), and we’ll start there. The IBM Model M was the first vintage keyboard I sought, and they are certainly not hard to find or limited in availability. They are even made today, so you can buy a new Model M keyboard if you so choose. Anyway, the Model M was first produced in 1985, and gave us two of the most important conventions in keyboard design: the PS/2 port and protocol that connects it to a computer (superseded by USB now, but it’s not hard to find it still, it’s that green/purple round port present on old computers), and the 104-key layout that has since only seen the addition of the Windows keys in all of the 40 years it’s been around for, and has been adopted by every single “full-size” keyboard since 1985. This makes it possibly the most important keyboard of all time; this is the one that gave us most of the current context around keyboards. I currently own three Model M’s, each with its own “thing”:
- The SSK lacks a numpad as it was intended to do what its name suggests,
- The second one is in a grey “industrial” chassis as opposed to the standard beige,
- And the third one is a common beige and full-size variant that didn’t use the PS/2 protocol as it was meant for a terminal system and not an IBM PC.
The way these keyboards arrived at my doorstep, the former two were usable with a computer out-of-the-box with an off-the-shelf PS/2 converter that made the keyboards work over USB on my modern computer. This method would make use of the existing controller inside the keyboard, which is a PCB with all the necessary parts to make the keyboard talk to an IBM PC. This PCB lives separately from the actual key switching mechanism and the housing which holds the keys you actually press, and is thus swappable. This solved the problem of scale production for IBM, where all key housings (the thing with all the keys that you can touch and see) could be made without any specific accommodations for the computer/device the board was to be bundled with, as it was just the small, separate PCB that was intended to differentiate those.
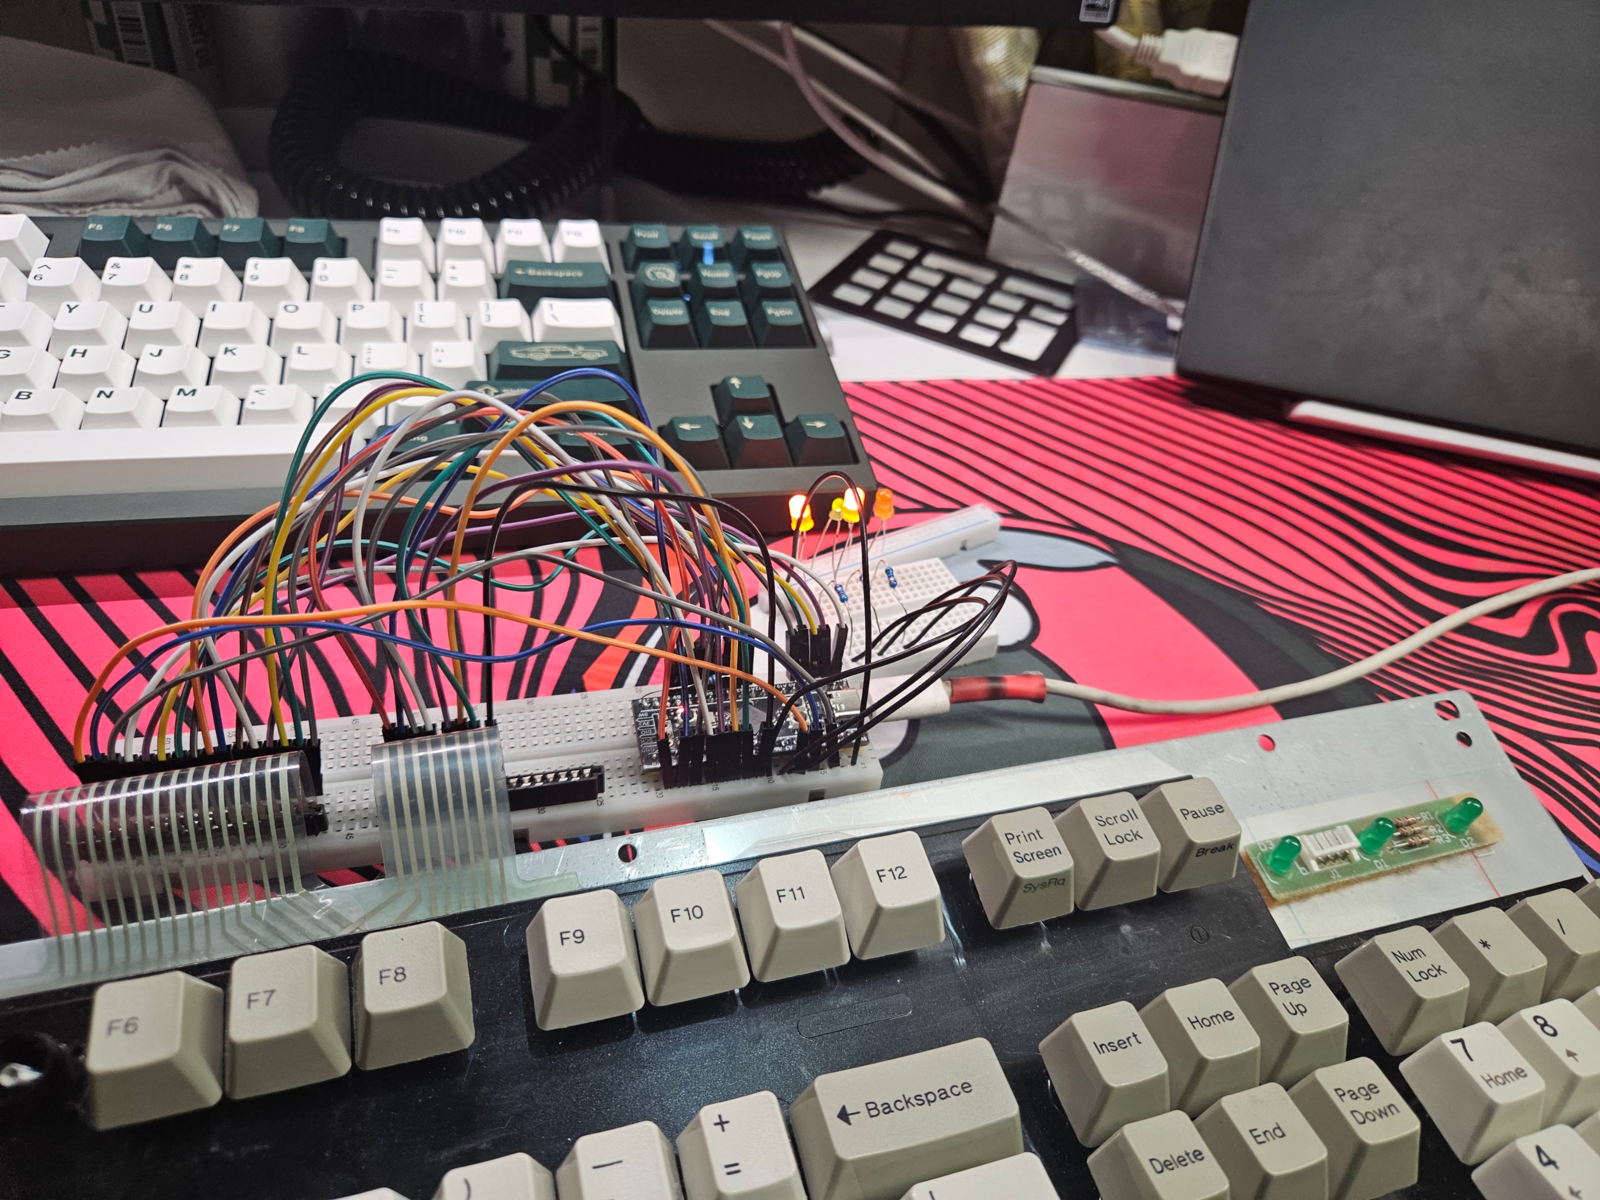 Testing the prototype solution. A good reference already existed, but didn’t use the development board I used, so I did have to adapt it. My F1-8X v2 in the background. Despite the slightly confusing name, it remains my modern keyboard benchmark.
This first solution would thus be situated between the original controller PCB and the target computer. And that works just about fine, you can retain the original cable the keyboard came with to use the keyboard, which also complements the overall look of the board on the desk. However, the third Model M wasn’t usable just like that. While a direct conversion method existed for that one too, it wasn’t possible to use off-the-shelf componentry for it (requiring some DIY work that felt too janky to me), plus it was entirely different from the method meant for the other two. I was also still used to my modern keyboards, which work over QMK firmware and its derivatives, allowing for extensive customisation (for example, any key can be configured to do anything, setting up layer toggle/hold buttons to make certain keys bound to multiple commands depending on any other button being pressed simultaneously, and to set up macros to make one key-press simulate multiple different keypresses). Meanwhile, using the PS/2 converter was a very “you get what you get” arrangement, with no customisation possible on the Models M. I also occasionally got this weird bug on Windows where my mouse would stop clicking entirely, and I’d have to resort to restarting the computer with the keyboard to get back its functionality. It only happened when that converter was in use, and I couldn’t figure out a workaround for it either.
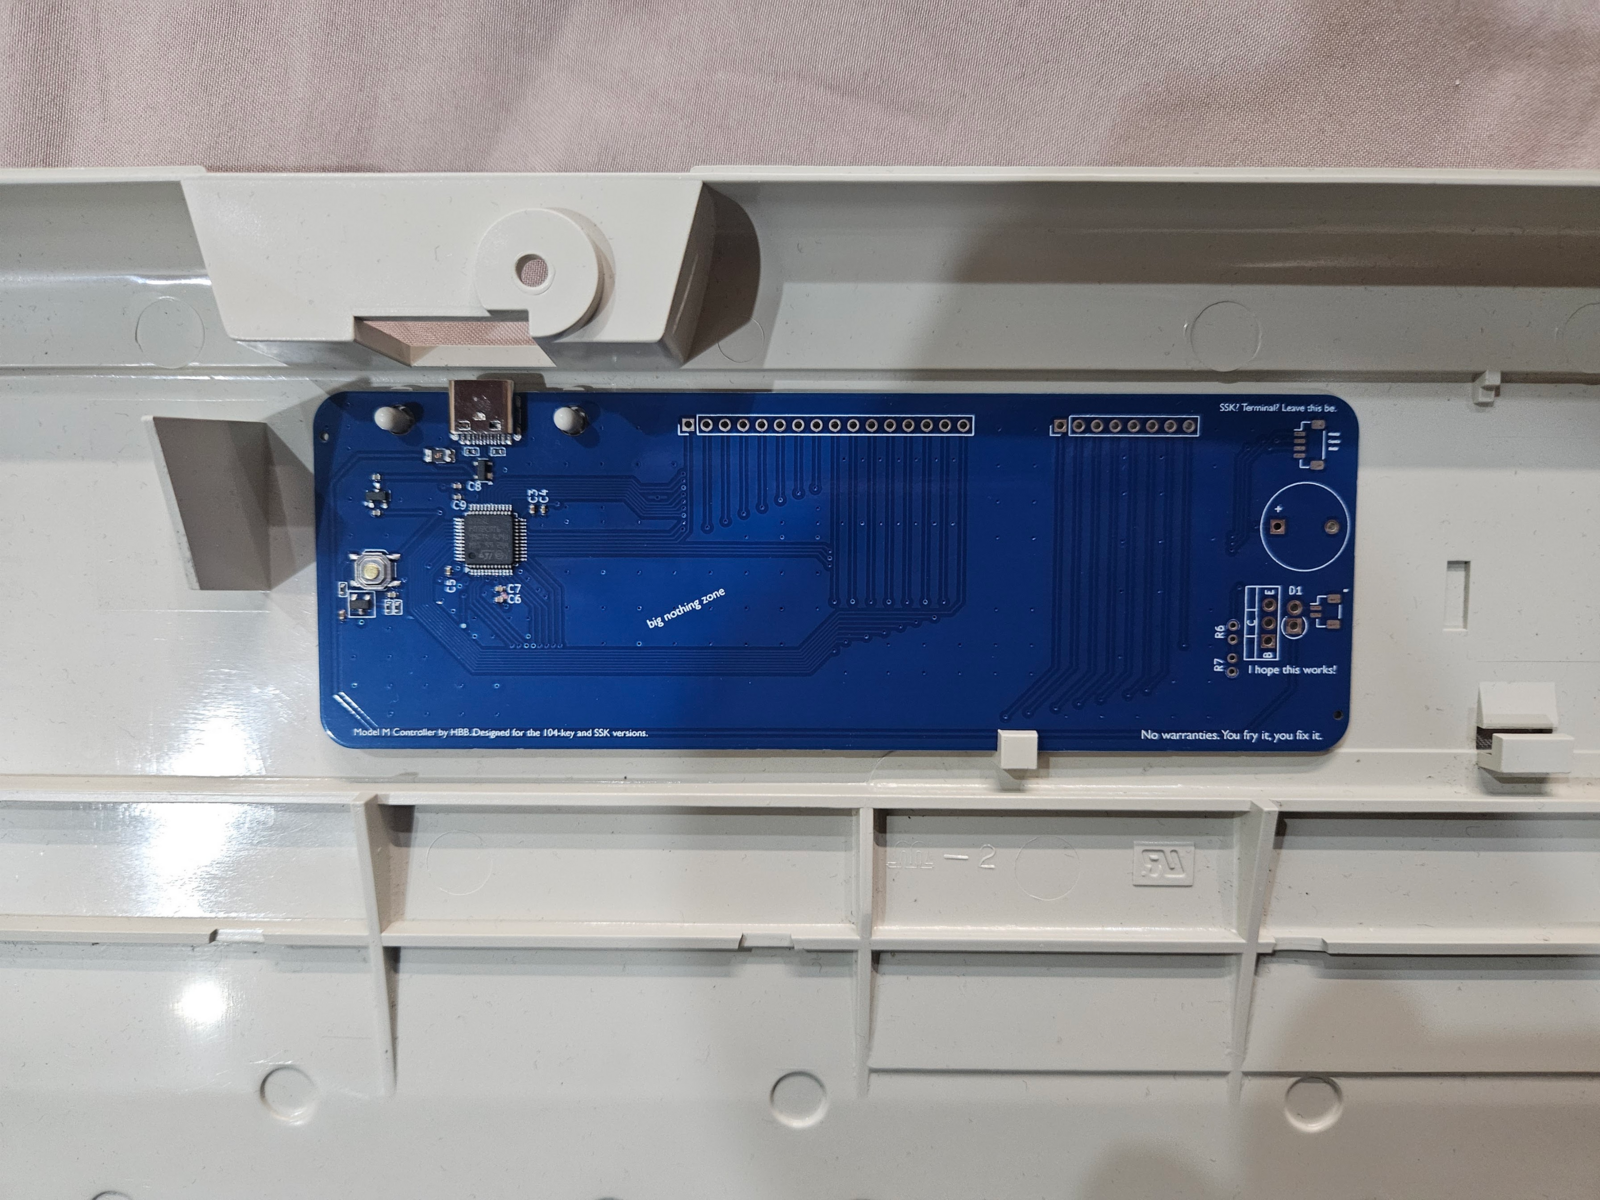
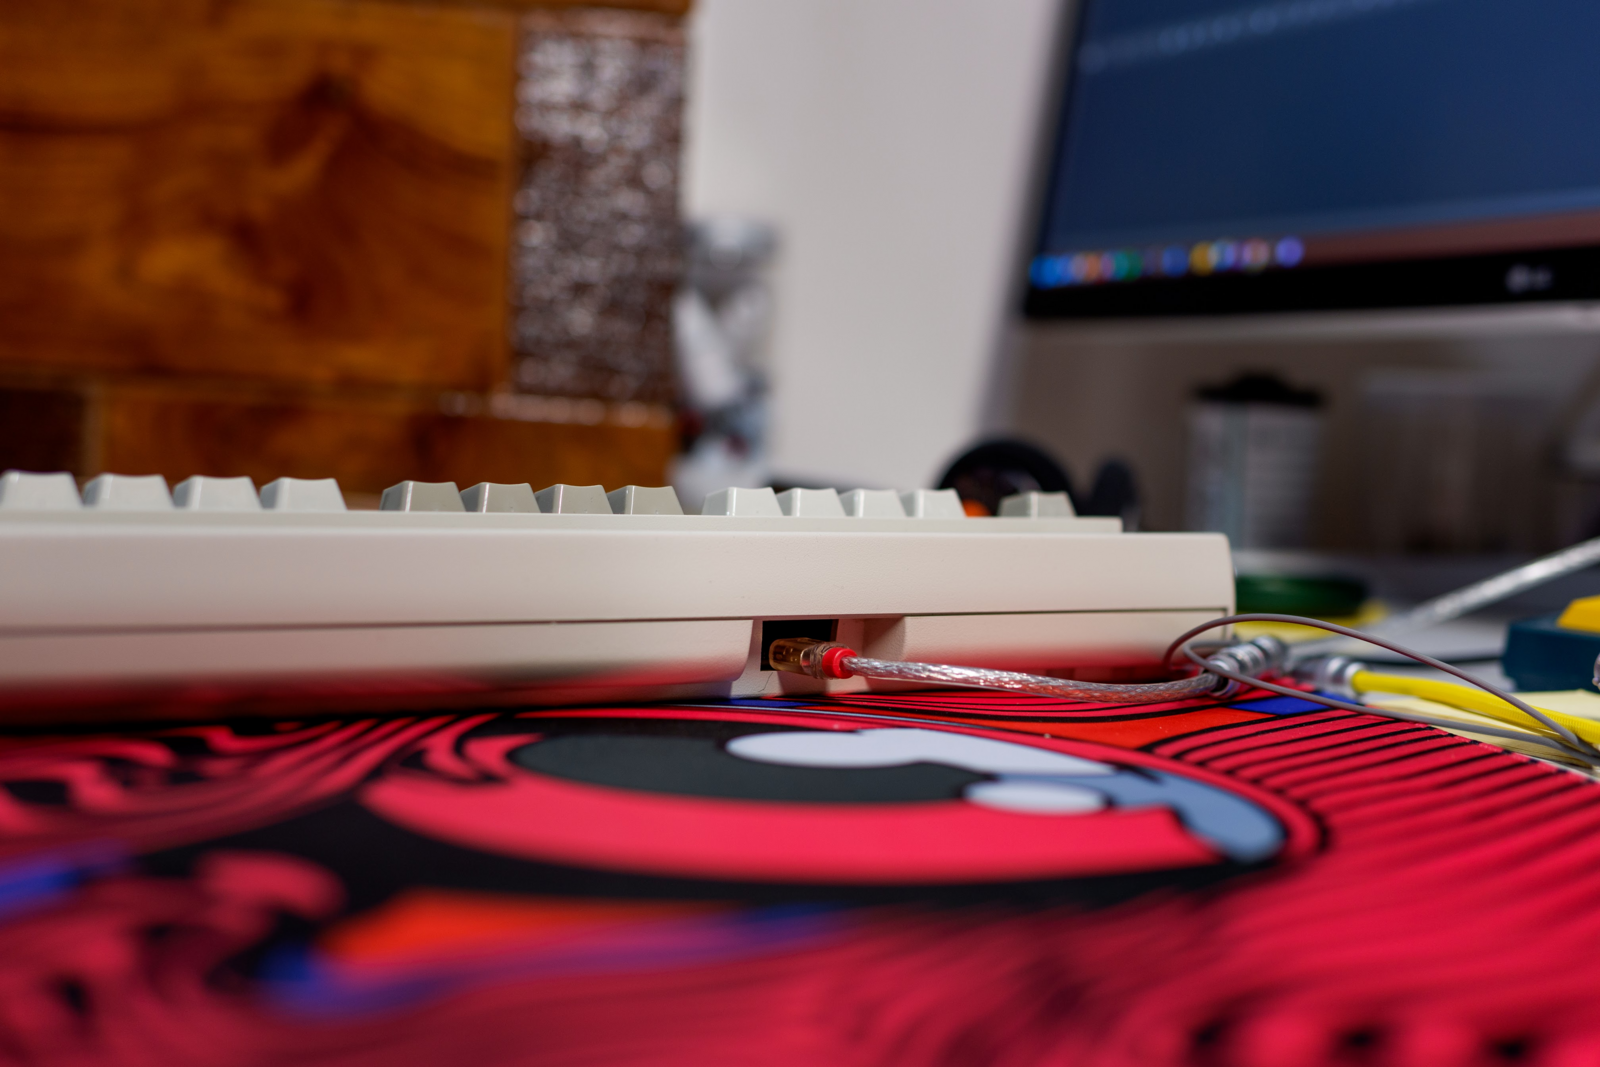 petty sacrilege, but it works very well!
While a lot of vintage computing restoration will focus on retaining the “experience” and thus try to maintain compatibility with its original computer and period-correctness for the original electronics, and retain the original feature set of the object being restored, I chose to forego that for my Models M, and just focus on making the keyboard as usable as possible with my devices (one Linux desktop and one Windows laptop) right now. As IBM made these keyboards in the literal tens of millions and these keyboards won’t be museum pieces anytime soon, allowing me to do stuff to them that’s not exactly restorative in the traditional sense without hurting something historically significant. I also cannot justify the cost of importing an original IBM PC across the world, and also store something like that when I don’t have a realistic use case for it. So, I made my own Model M Controller PCB that can work over USB-C like any modern keyboard also would, while supporting QMK firmware, and even support running a buzzer and solenoid as a bonus, something that many vintage keyboards would do to emulate the feel of a typewriter, familiar territory for the new computer user of its time, and something I really wanted as a feature in at least one of my keyboards. It was also trivial to support the SSK’s reduced layout (I didn’t even account for it but it worked anyway because IBM’s design was made as such for the original controller to work in the same manner). I kicked it off with a hand-wired prototype using an STM32-based “Blackpill” development board, and that could have also been the final “production” setup, had there not been very little clearance inside the board for all this to be housed. This was also my first time designing a PCB, and this wasn’t an entirely unique project, so I was able to take a lot of help from other sources that had already done something similar in the past (but weren’t meeting my own expectations, so would have required some further modifications). And it got my foot in the door of PCB designing. It’s also great fun, and because keyboard PCB’s really aren’t difficult to design for electronically, you can be very creative with how they look and cheap with how they’re constructed (I didn’t do that a lot just yet), so it’s quite a rewarding experience which I can lean further into, even without keyboards being the main driver.
I have since followed this up with other projects that are in the same vein - not traditionally restorative. One of my ongoing projects deal with my Wyse WY-50. Wyse used a proprietary protocol to connect their keyboards with their computers, terminating into this weird 8-pin DIN connector that only their computers ever used. I also received the board with no cable (it was cut, a common disposal practice for decommissioned office keyboards, and not shipped), which added an extra step where I now needed to figure out the pin-out of all those eight cables on the PCB, and then be unsure of how the rest of the job can be done (there was some information on a GeekHack page by a prolific user who did foundational research on several converter protocols, but it was rather inconclusive for me). Fortunately, someone had already implemented a custom PCB that I could order and assemble myself, and get my keyboard working again. One missing feature of this PCB was USB-C, which I implemented and replaced the original, older, USB-Mini and the PCB is now ready to be sent to manufacturing.
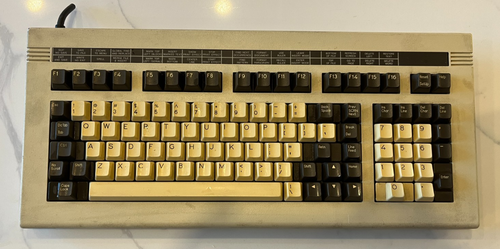
A pretty stupid decision to not have taken pictures of this board after cleaning it up but before taking the PCB apart, but this is the eBay listing picture for this board that I could still find. Whoops, but it’ll be back to its former glory soon enough.
Additionally, in my exploration of this board, I also figured that its layout is quite similar to a modern 65% keyboard, with an added Function row and numpad on top, which means there can be a kind of modern revival possible here. However, they are still not a 1:1 match, as the Wyse is one quarter of a unit shorter than the standard sixteen units that a 65% keyboard would be (1 unit or 1u being the length of the side of a key switch footprint, or 19.05mm in our case with Cherry MX-style switches that the Wyse used, and our theoretical modern keyboard concept also would). Nonetheless, it can be made to work! You just need to account for the dimensional changes and shorten the sides of the custom PCB needed a little bit. I plan on doing this as a future project with a modern 65% keyboard, by way of a custom PCB for it too, though I’m not sure which. And not to leave it out, a keyboard named the ASCII-F already did take inspiration from this very same keyboard in its layout, termed the “65TK”, foregoing the function row but retaining the numpad. And while it left out actual compatibility with the WY-50 keycaps for modern sensibilities, there definitely won’t be a lot required to make a custom PCB for the ASCII-F too, to make it truly WY-50-like. It would cost me a lot to try the latter thing though, but perhaps some day when I have some more disposable income, I will reopen that, and buy an ASCII-F to try this out. For now, just a regular 65% with WY-50 key compatibility would be incredibly cool!
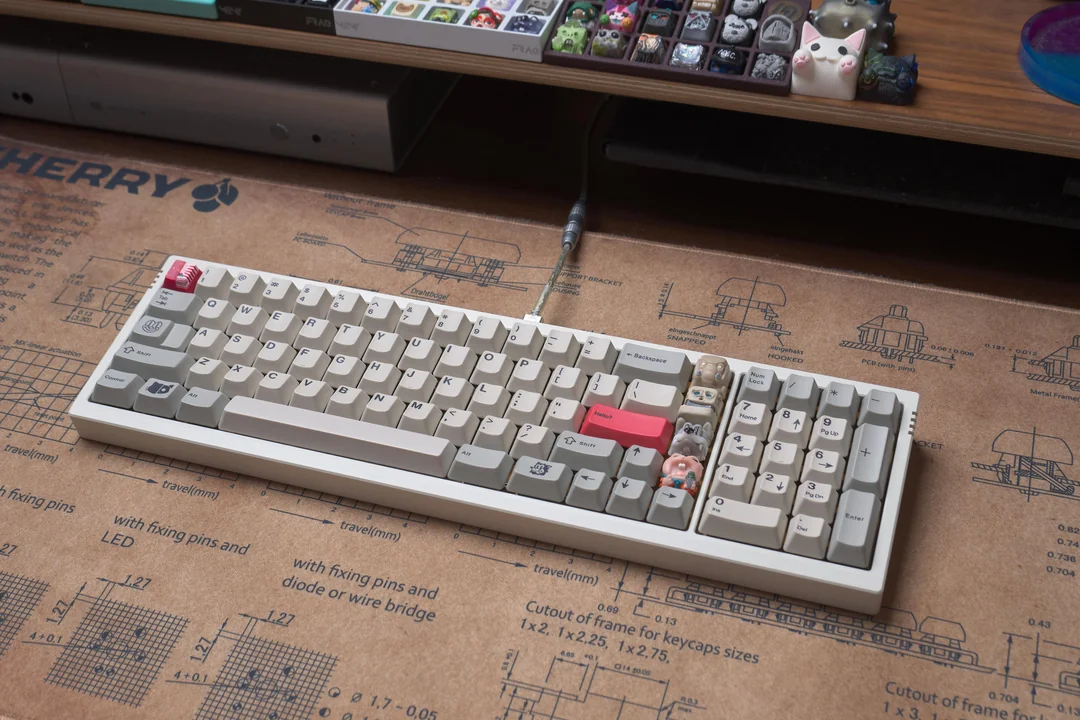 The ASCII-F. Maybe later. Credit: LightningXI
In my time with using keyboards, for smaller tasks like day-to-day navigation on the Internet, writing messages to people on Discord, or for gaming, I still find that most modern keyboards are more “reliable” to use. That just means that you can game with them without an issue, they tend to be more comfortable to type on, and they occupy less room on the desk. Most of these problems are either solvable or are not that important to work around. For me, restoration is the understanding and the fixing of these problems. None of my keyboards, again, are museum pieces, as I cannot afford such a museum piece, or source one from some warehouse sale as I do not live in a country that had computers in the late 90s in such numbers that I would just come across a rare keyboard like that. So my thinking goes “why not just make it as easy-to-use as possible, while retaining the typing feel and the sound”? And that is always the goal with all my restorative work! There are many keyboards that are not a big task to restore to such a level. For example, my Dell AT101W just needed a nice cleaning and it was good to go. I still just use my PS/2-to-USB converter and it is not an inconvenience. But there is always room to improve, and there are some vague ideas in my mind for this AT101W and all my Apple keyboards, which don’t need any intensive internal conversion, but are good to use with their original hardware and an external converter. I will get to those later, after I have prototyped something as a proof-of-concept.
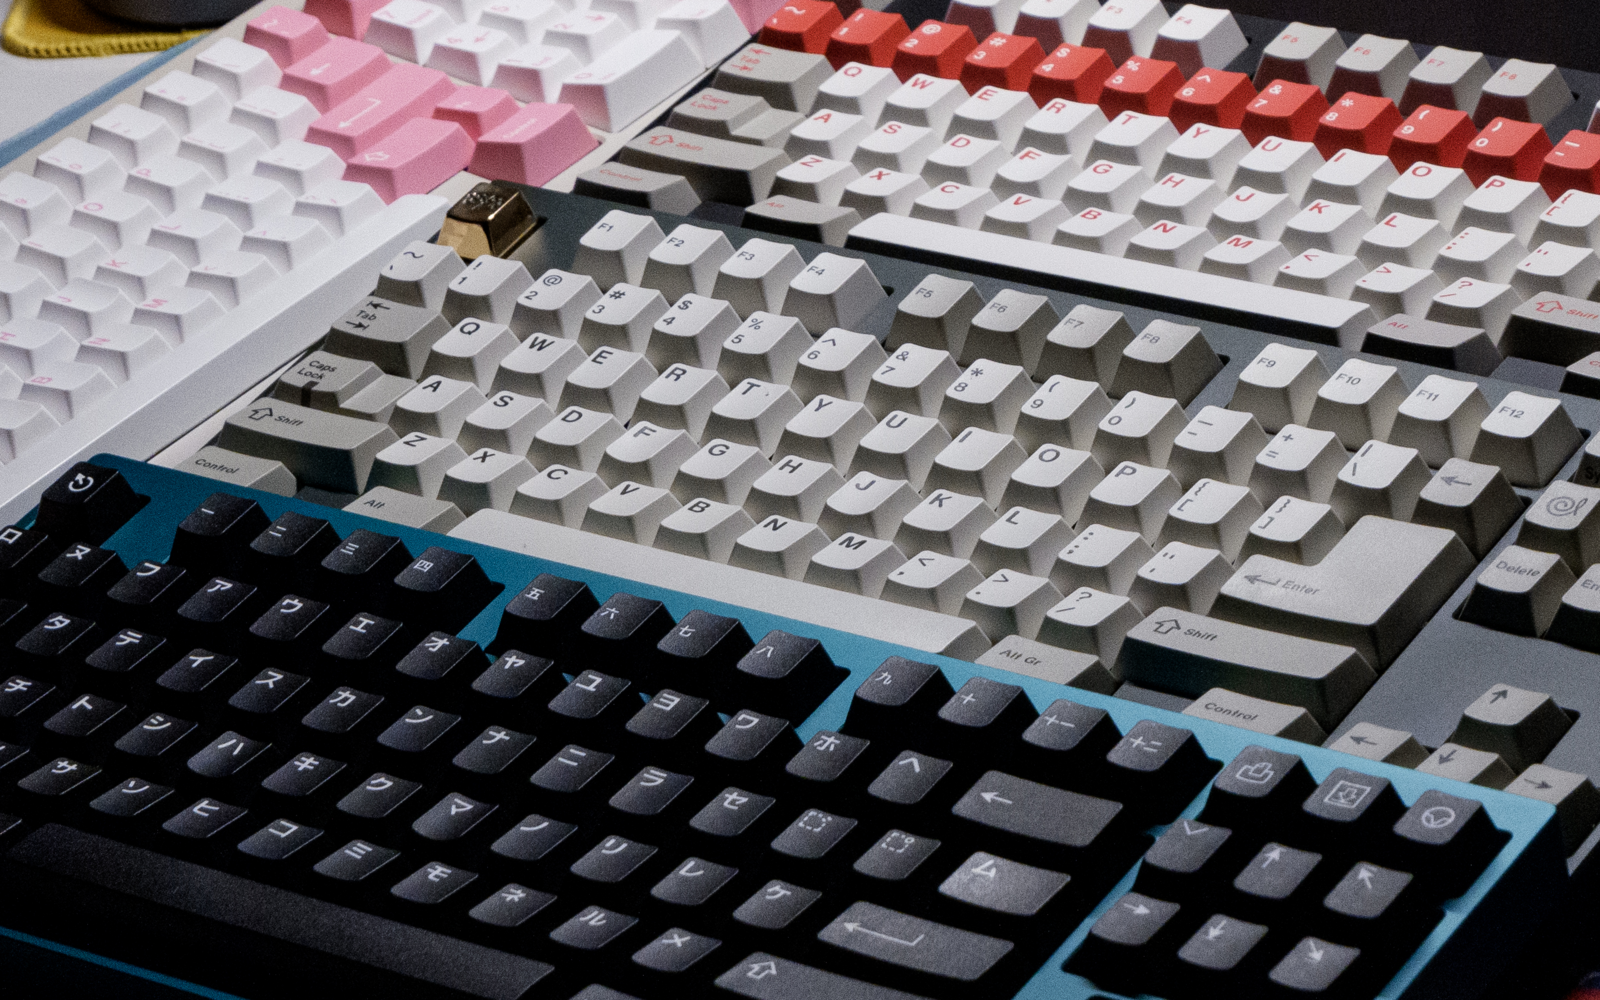 Some modern stuff c. early 2025.
For a more bootstrapped project, I found an HCL HCK-4400 keyboard from another Indian keyboard enthusiast who had this from somewhere, but couldn’t make it work. I did offer to help him out (it was a PS/2-compatible board, but used the older DIN-5 connector so it needed an intermediate converter before you could use it with just a PS/2 converter, and those are available if you know where to look), but as he offered to sell it to me, I didn’t hesitate either. HCL clearly made these for quite a while, so it may definitely be possible for you to find one too, especially in its newer black-coloured iteration. It is a flimsy build, with a plastic chassis (typical, nothing wrong with it), and a plastic mounting plate mounted to nothing (they’re metal more often; and while not unheard of, it’s unusual to see a keyboard assembly just floating inside a case). It also came with Cherry MX Black switches, still common to this day, allowing me a lot of freedom in how I wanted to “restore” it, but I chose a pretty traditional path here, and just put some new Cherry MX Black switches in the thing instead of going for something more exotic. The older switches had seen better days and were too dusty to do anything good, and were thus discarded. Yes, there are people who lust after “vintage” Cherry MX Black switches, but they weren’t of that vintage, so it was fine. Anyway, in the process of desoldering things and getting the PCB ready for the new switches, I managed to crack it in some places. Gnarly stuff, but a community member with a lot more competence with a soldering iron was able to rescue it and the keyboard still works with the original PCB.
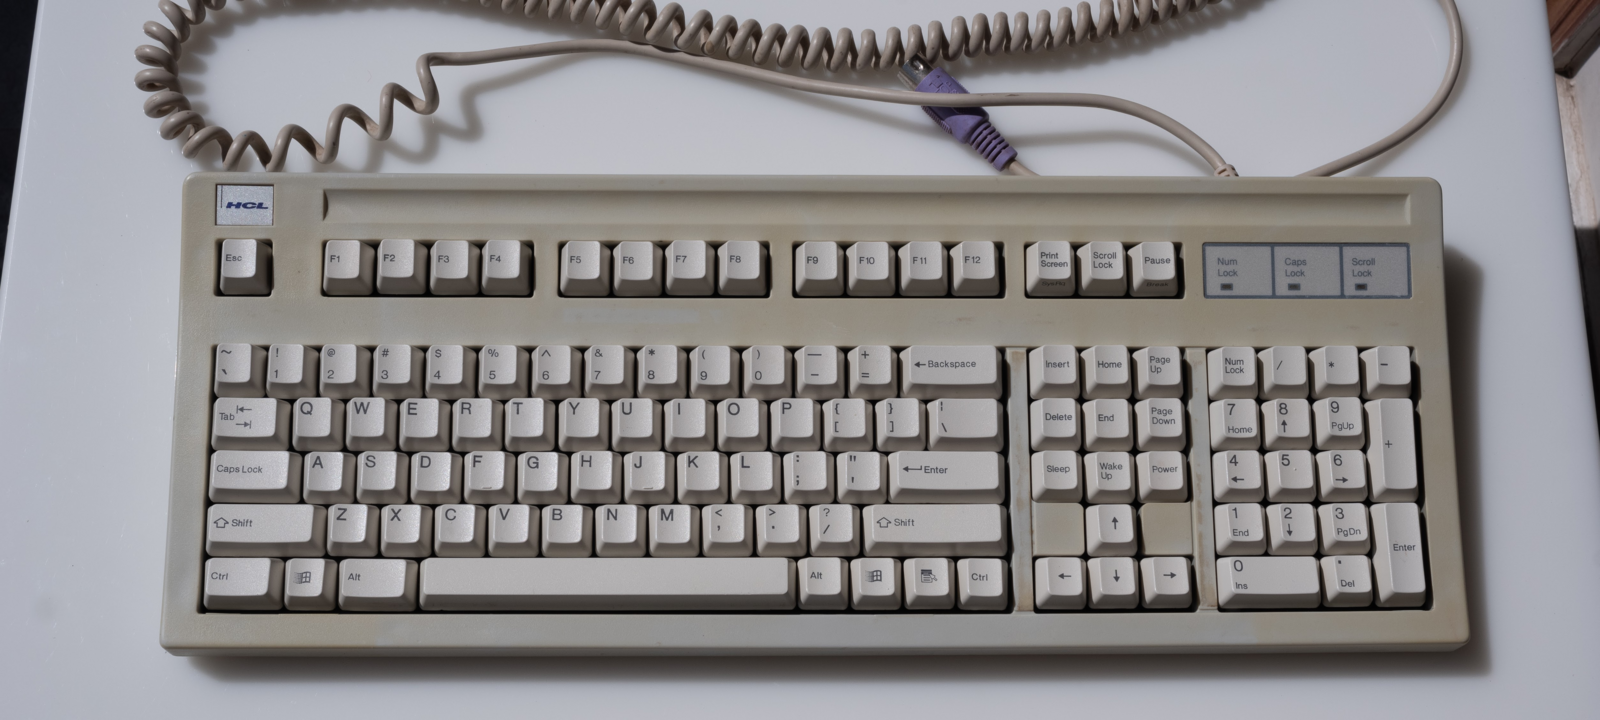 The HCL. Cleaned up decently enough.
Naturally though, no one had made anything modern for it, or even taken the dimensions of the original PCB, nor was I successful in finding any documentation for the keyboard. So I took some dimensions and put together a new design for this board. It uses a cheap development board as well, but it should be trivial to change it to something else if someone prefers that. I also took some liberties with the space available and extended the PCB a little bit to attach a USB-C connector and have it be flush with the bottom case of the keyboard, thus making it even better suited for use on my desk. Once again, not exactly restorative, but there wasn’t much to restore in this example, as it just used PS/2, a protocol that’s still somewhat relevant today. Overall, the keyboard is quite nice. I am a huge fan of a plastic mounting plate with Cherry MX Black switches in my modern keyboards (which are far heavier and made of aluminium and brass), and this keyboard does that but with a large hollow plastic case, giving the setup a nice twist for me. I will also need to make a plate for this board, but with the PCB design in place, making a plate that fits wouldn’t be complicated. And anyone wishing to restore their old HCL keyboard would be able to use the same and make it modern!
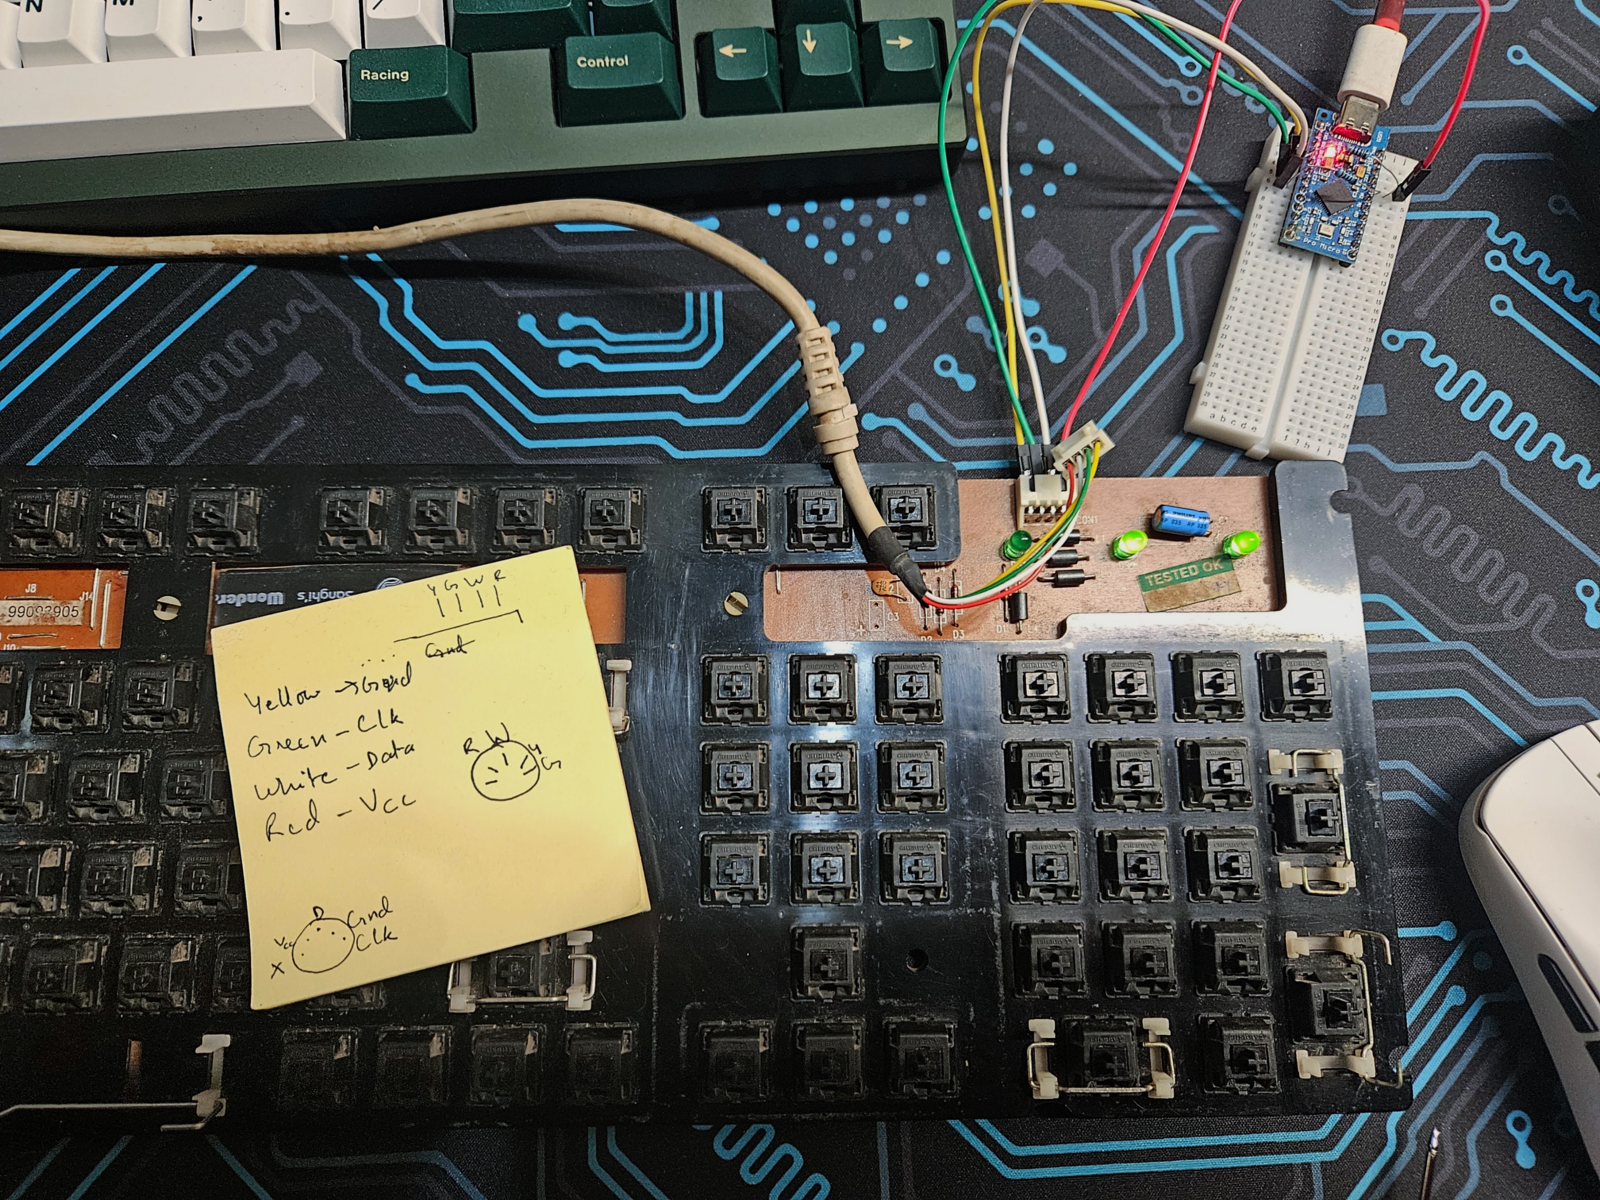 Testing the pin layout to get a PS/2-to-USB conversion done internally. I still retained the cable later, but it was good to know what went where.
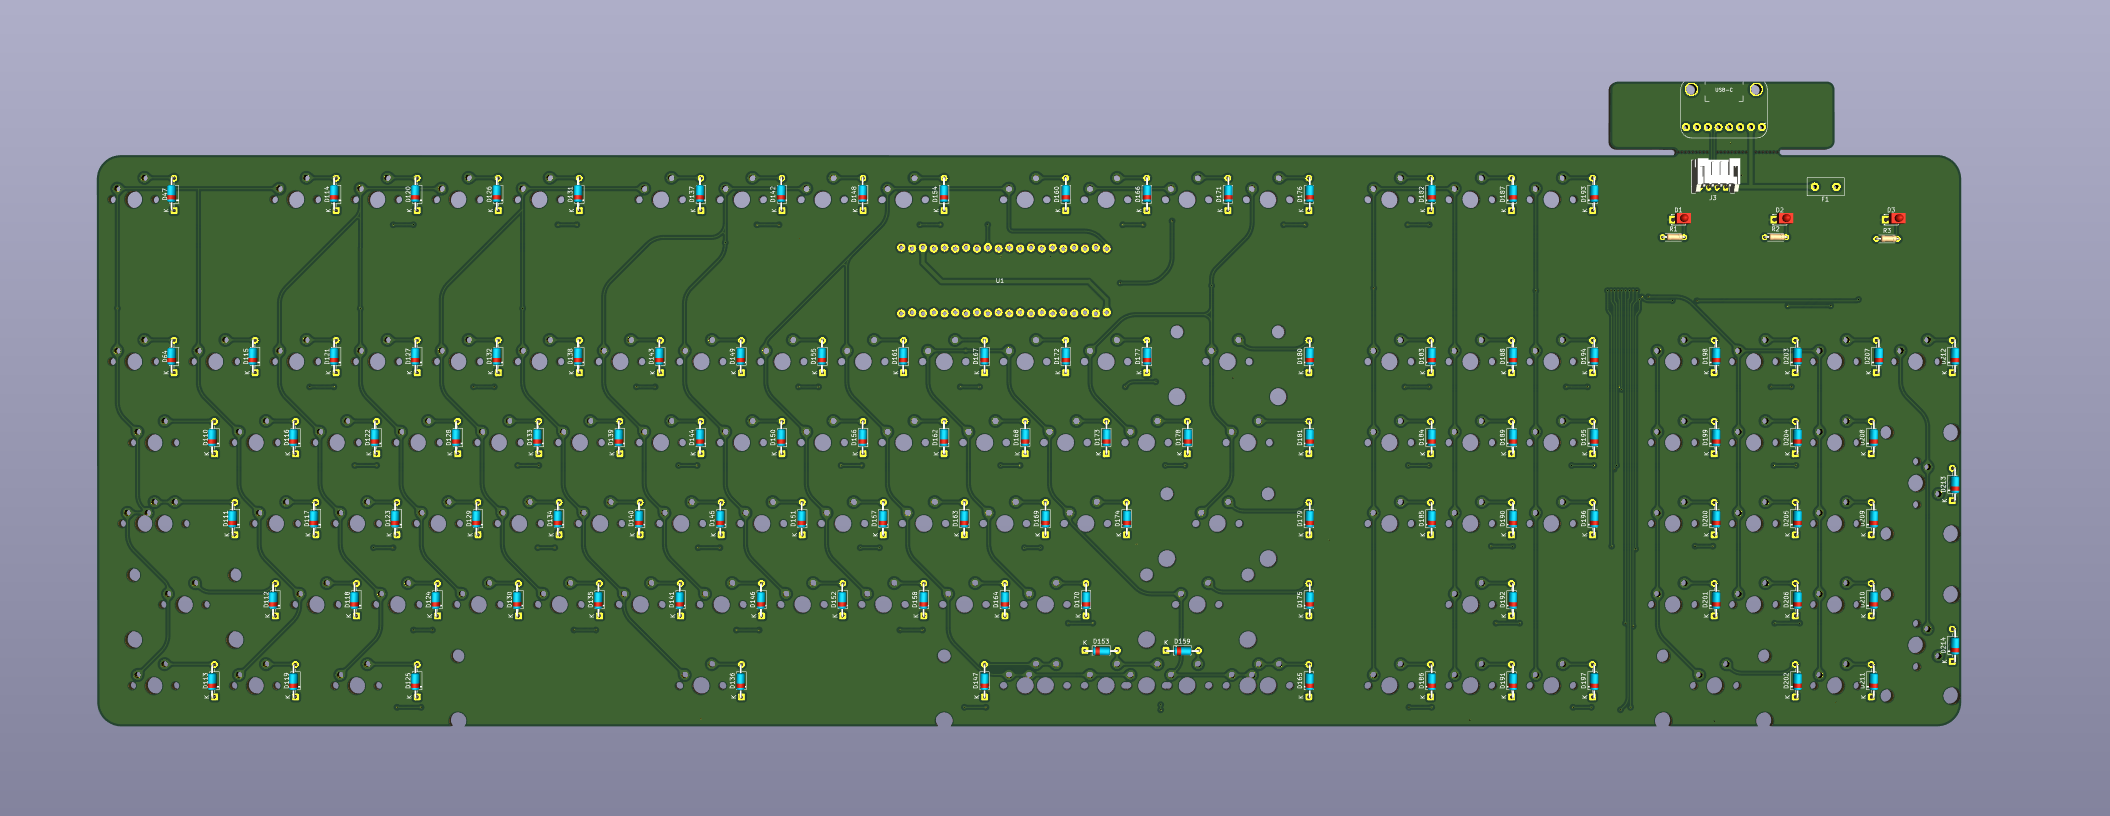 Close-to-final PCB layout for the HCL.
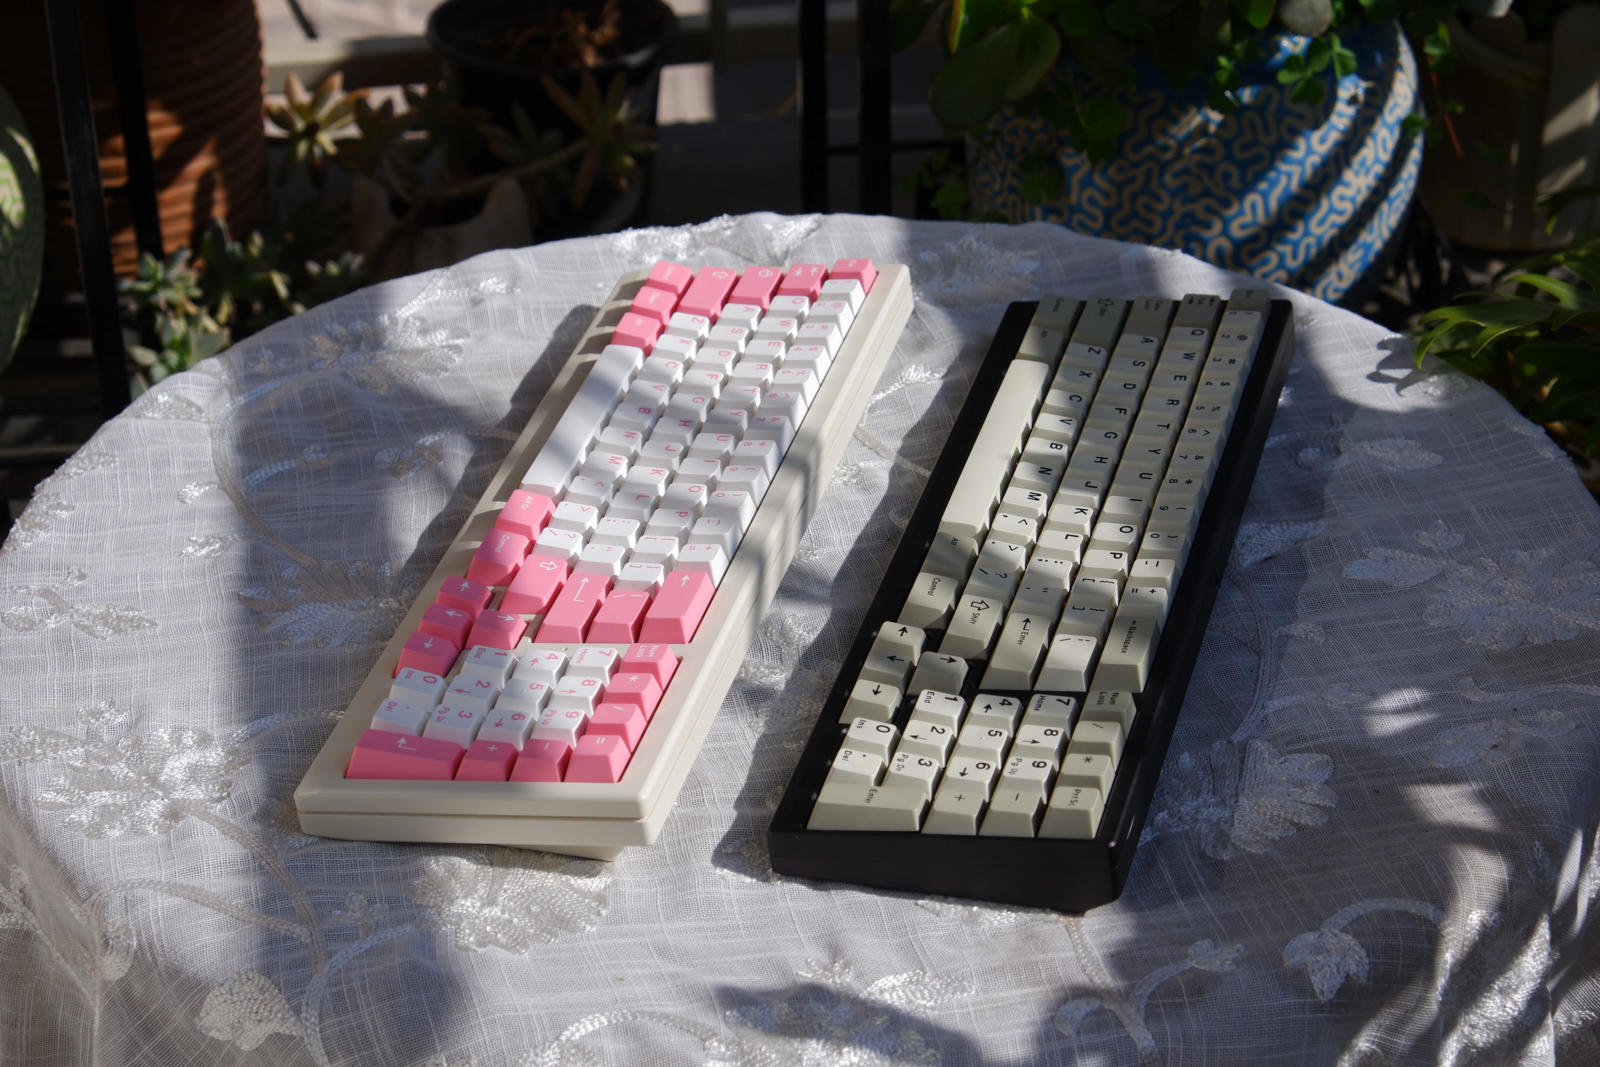 Cypher (right, in black), alongside a keyboard it inspired, the Petrichor.
A semi-vintage keyboard project I have in store is for my Cypher FRL 1800 keyboard. I got this through the bankruptcy auction of an EU-based keyboard vendor (many such cases, unfortunately) for a great price, and it’s a very competent, very classic, no-nonsense modern keyboard with an interesting form factor (TL;DR - Cherry made a compact version of a fullsize keyboard, giving it the -1800 model designation. As Cherry’s switches and keycaps are still the modern standard, a lot of their other innovations have carried over into their hobby, including the 1800 form factor. Remove the top function row, and it’s an FRL - Function Row-Less - 1800). At the time when I was using the Cypher for the first time, I was also using my Apple Extended Keyboard, the M0115, which still remains an underrated and easy-to-obtain vintage keyboard in my opinion. The lovely Alps SKCM Orange switches in mine are quite enjoyable to use. However, Alps switches really do shine more in plastic chassis, while using them inside modern aluminium-brass keyboards is a little compromising in my opinion. Alps also stopped making them several decades ago, and they are thus quite hard to obtain now and the usual way of doing so is to “harvest” them from an old board. And while the Cypher is all-aluminium, it is quite light and has a decent amount of room inside it, allowing for some sound reverberation. The absence of brass also reduces the sound attenuation caused by the denser material, and that’s also a desired feature to obtain the sort of sound expected from these Alps switches. The way I saw it, this made the Cypher a pretty decent (and unique) candidate to be a modern Alps keyboard.
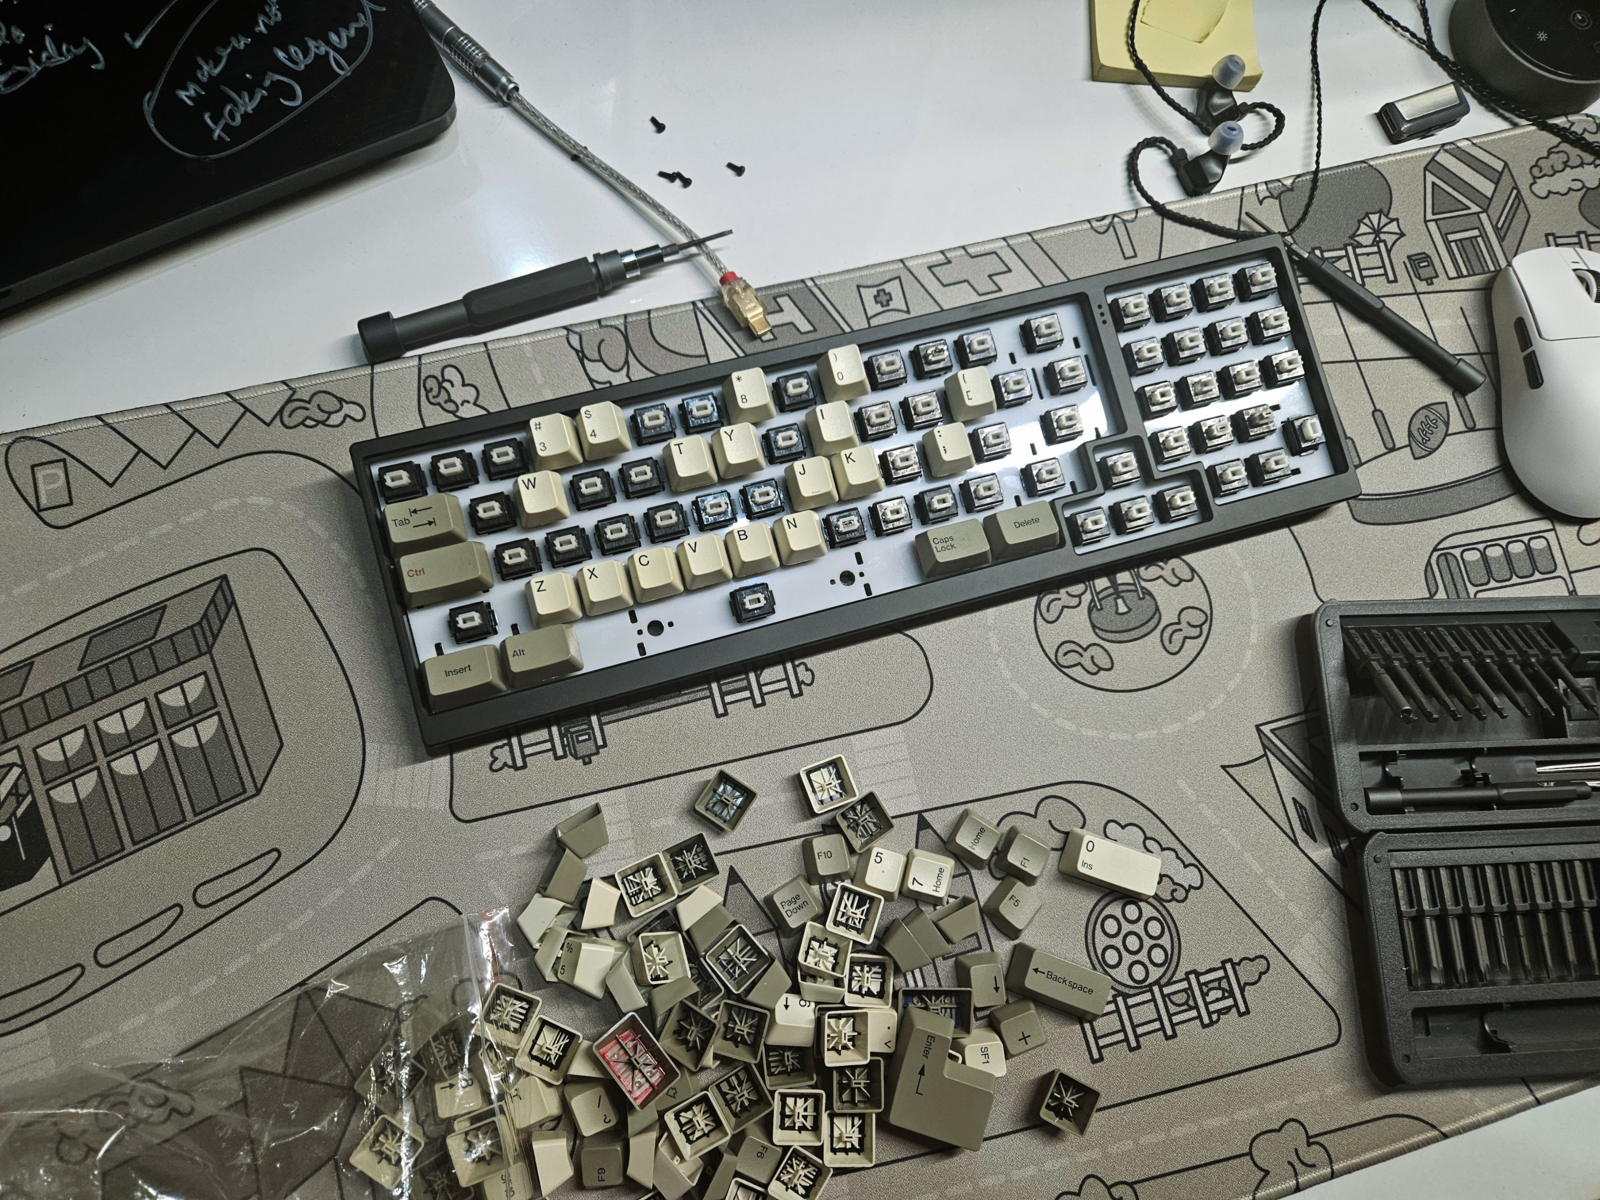 some testing in progress, this plate’s spacebar positions were not going to work so well for us, but the rest worked and was promising!
The designer of the keyboard, CableCarDesigns, was kind enough to have already open-sourced the PCB design from the very start, so I wasn’t stuck measuring the dimensions for fitment, which is quite a nice leg up to have and fills you with confidence as a too-large PCB won’t fit, and thus be a waste of your money. Now, Alps and Cherry MX switches are quite different for a PCB to take, as they have different points where they are soldered to the PCB, one switch cannot fit into a PCB intended for the other. Fortunately, you CAN still make PCBs that can fit both of them, and thus make a keyboard PCB that can be used for either switch. Possibly at the same time too, but that would be rather weird if I’m being honest. I went that hybrid route, so that I can get five of these PCBs manufactured, and retain one for my Alps build, plus one as a spare, and sell the rest to other Cypher owners interested in just having a nice spare PCB for their boards that they use with regular MX-style switches (or indeed replicate/iterate on my build). I also intended the keycaps to be from the Apple boards I got inspired by, which can also be done with some minor caveats: the spacebar on the Apple Extended Keyboard I and II is a shorter length than the standard length and the Cypher would look weird with that reduced-size spacebar, the function-row of the AEK’s is vertically mounted rather than horizontal, and there is no cut-sized Shift key that the Cypher needs on the right side because of the 1800 form factor. The first one of these was fixable with just a normal spacebar from any other Alps board, while the second one solved itself because the Cypher is an FRL layout and just lacks the Function row entirely, and the third one can be resolved more creatively, with a key from an entirely different Apple keyboard (the M0116) that matches that size. The plate also needed to be remade for Alps switches (you can make a hybrid plate too but it holds neither switch properly, and thus is rather inept at its job), which I made but with some wrong measurements for the spacebar, so the second prototype of it should be the one that works fine with the keycaps I’m intending to use. This will ultimately be a very unique build that isn’t easy to replicate for someone else, but the PCB is open-source, and the plate is available for anyone to download and get laser-cut. So anyone keen enough can still do it, provided they can source the keycaps and switches from elsewhere like I did.
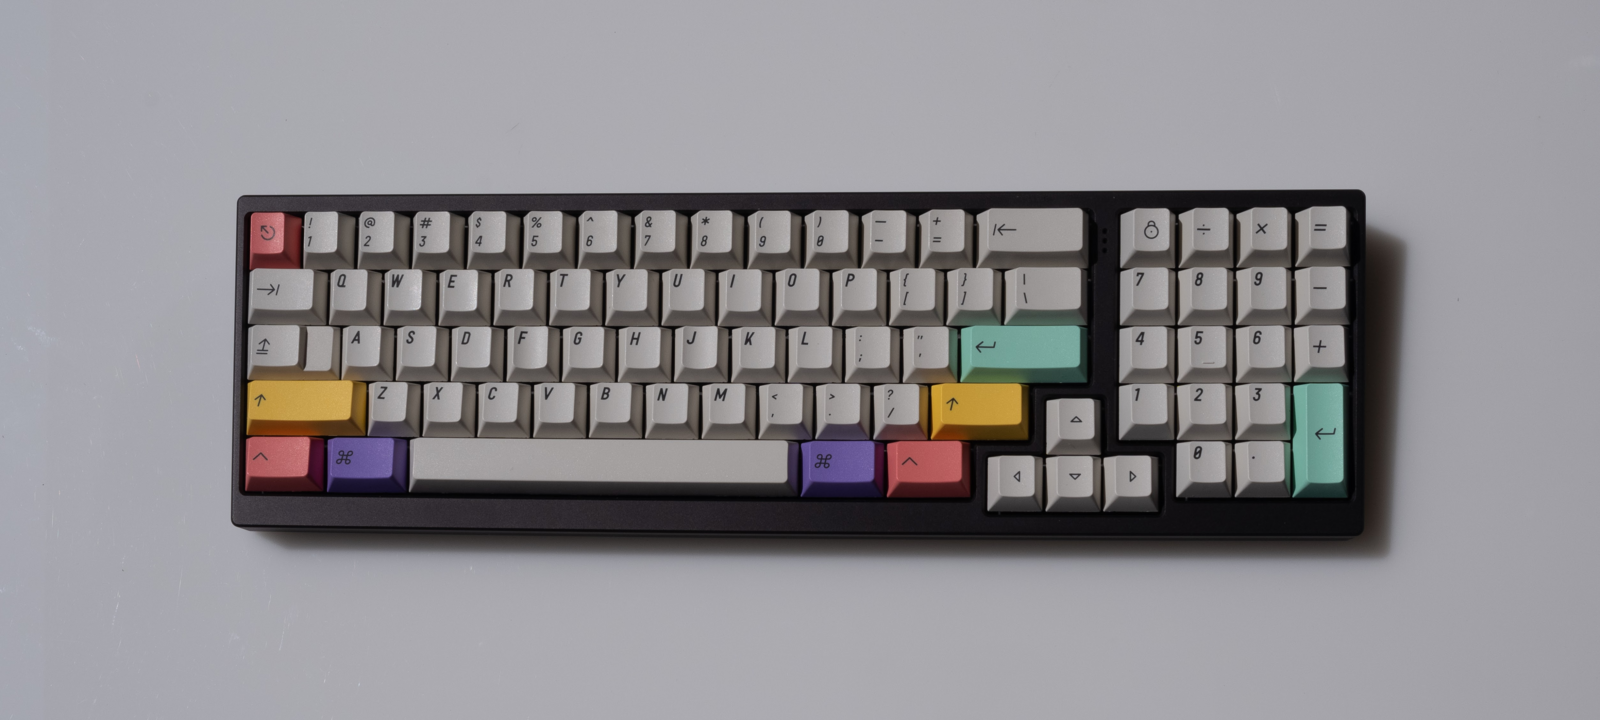 The GMK CYL Extended 2048 keycap set on the Cypher, although the actual project will use original Apple keycaps, this set was inspired by those, and works on MX switches instead of my target, Alps SKCM. So it’s a nice stop-gap measure on this board.
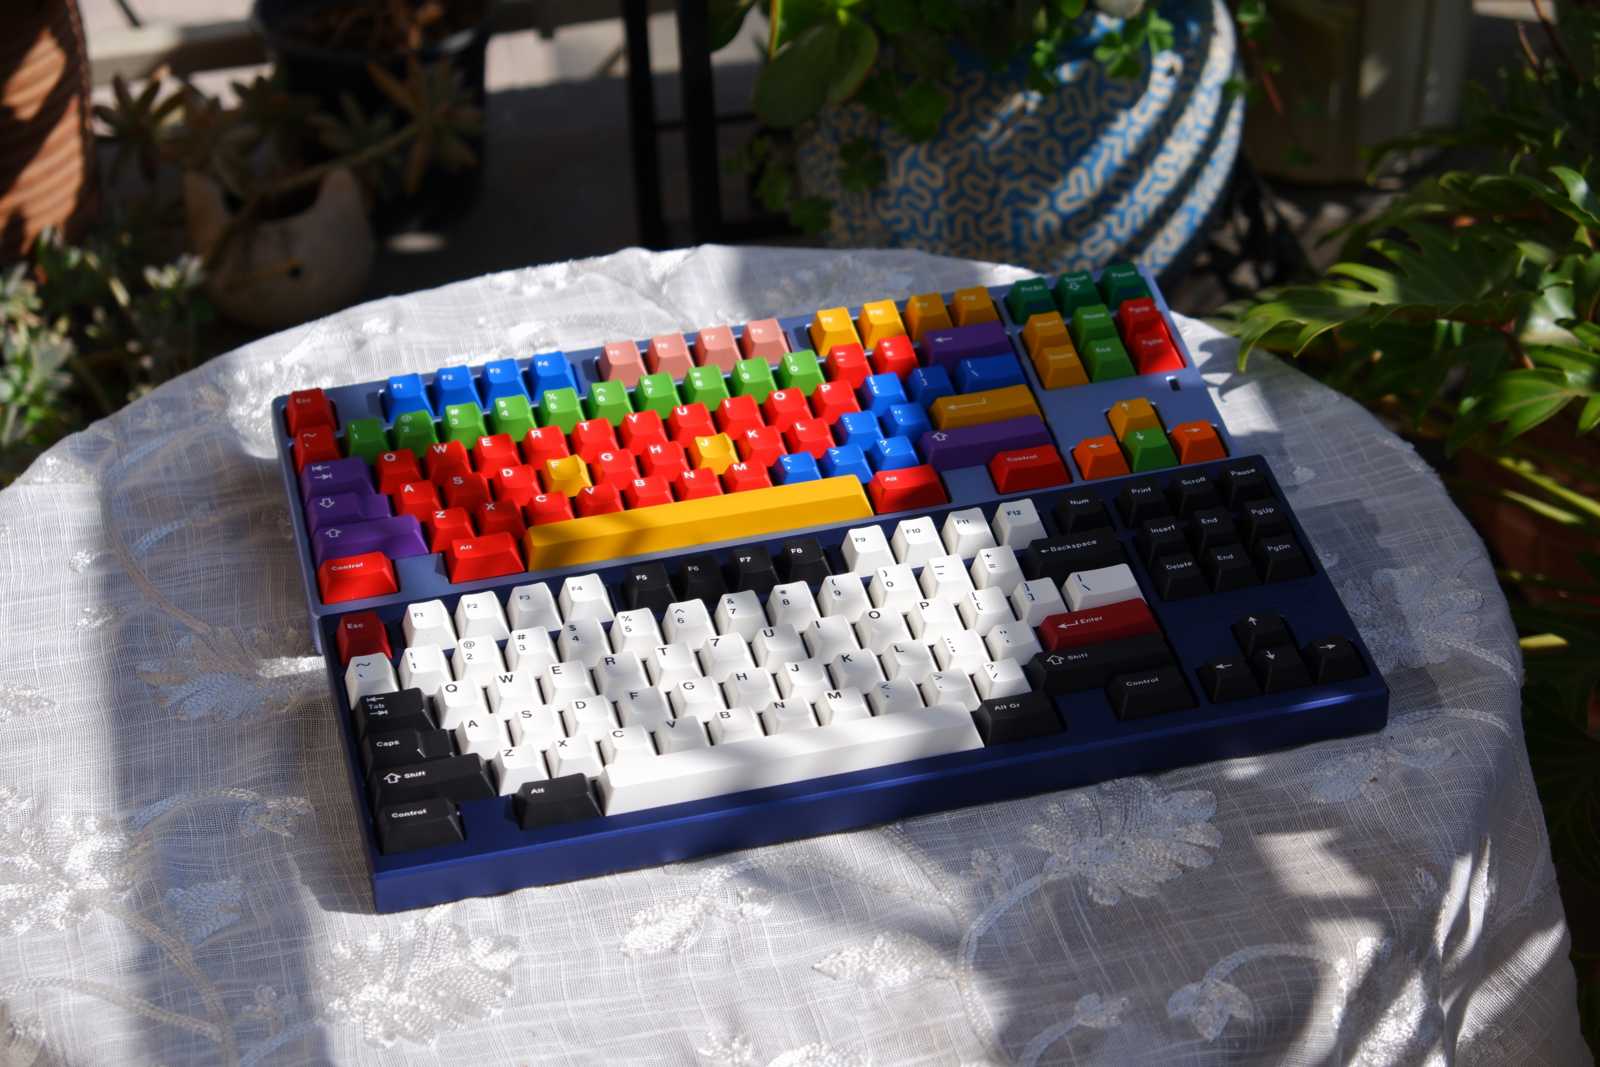 Pop of colour after all the beige. Spyder TKL in Ice and the Cloudline in Navy.
The keyboard hobby in the modern day has become very accessible. That is, “having/getting a nice keyboard” is a pretty simple process now. It doesn’t require you to have any knowledge of electronics or protocols, but all of that was what brought us here. In the 2000s and early 2010s, the computing industry at large had already converged towards rubber dome keyboards, which were simply too versatile and cost-effective to not adopt. Thus, fans of old keyboards were stuck with trying to keep their now-obsolete keyboards still relevant, and that was a task easier said than done for most keyboards. Taking on these projects, discovering new things along the way, and making something that was indeed truly yours, was all part of the process. I found someone on a forum, who took an old prebuilt keyboard, and dropped it into an Apple vintage keyboard case with some minor modifications. It looked truly beautiful. And you can do all of that, and discover more such things, if you are interested enough to look towards the past. I thoroughly enjoy my time working on my vintage keyboards, and making them more versatile for my day-to-day use will aid me in using them a lot more!